
Using E-Stim Connect on a PC.
Quick version
- Install E-Stim Connect.
- Connect 2B with the Digital Link Interface Cable. This should install the drivers for the Digital Link Interface, but if not you will need to download and install the drivers.
- Run E-Stim Connect.
- Connect to 2B and our server (Select Serial Port & Press Connect button to find your 2B, connect to our server and generate a key).
- Share Key with your play partner.
- Ask your partner to visit https://e-stim.online/connect and type in the Connection Key.
- Play
Longer Version
1 Install E-Stim Connect
Step 1 is Install E-Stim Connect E-Stim Connect is a code signed 64bit application, and needs to be installed.
2 Connect Digital Link
Connect the Digital Link Interface cable and install any drivers if required. With macOS it should be a case of plug in the cable and wait for the Digital Link Interface to be recognised, but in the event you do need drivers they can be found on our Drivers Page.
Connect your 2B digital link interface, to your computer and your 2B. Switch your 2B on, and ensure Commander on the 2B is switched on and active. (version 2.106 and above have the Commander interface enabled by default.)
3 Run E-Stim Connect
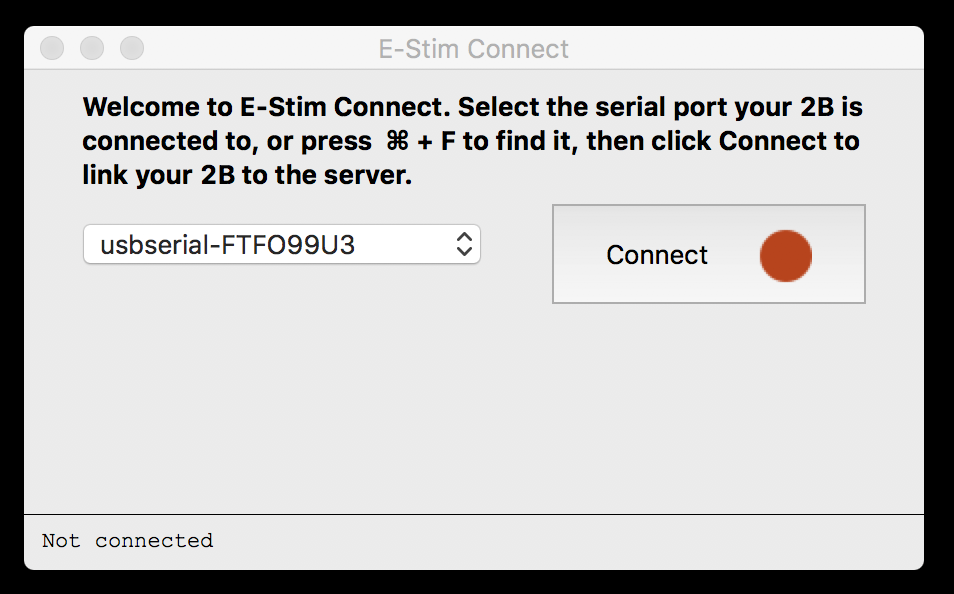
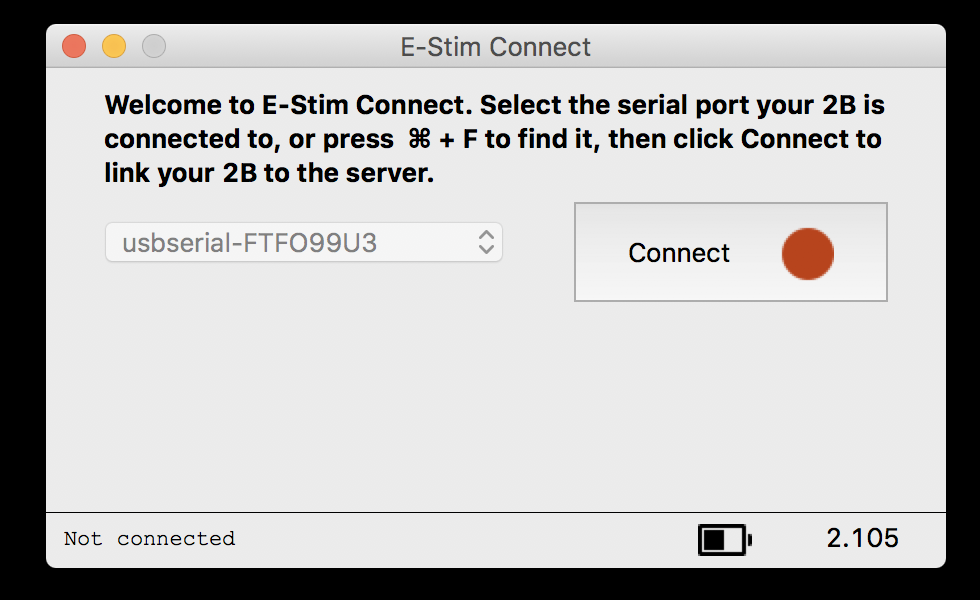
E-Stim Connect is the program that talks to both your 2B and our server, allowing an external user to control your 2B via the Internet and a webpage. Running E-Stim Connect from launchpad, you will be presented with the Connection Screen. When E-Stim Connect runs for the first time it will look on your computer for the existence of any serial ports. Since All modern Macs have Bluetooth ports, these will be shown in the list.
Preferences Startup Error
If you have installed a new version of E-Stim Connect over an old version then you may see the following error.
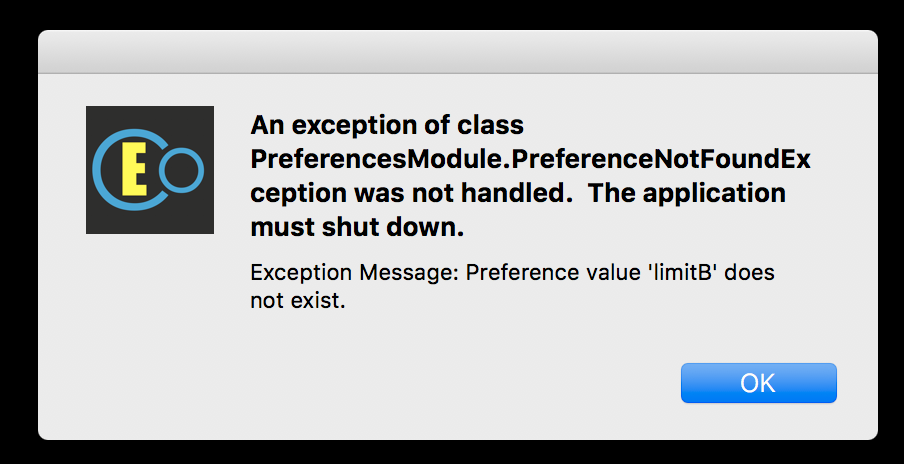
This error is generated when the preferences file stored on the computer does not match the preferences setup of the newly installed version of E-Stim Connect.
To solve the error, click on OK and then close E-Stim Connect.
Using Finder then navigate to and then remove the E-Stim Connect Preferences folder. You should find this at My Macintosh/Users/<yourname>/Library/Application Support/EStimConnect/ . You may find this is a hidden folder.
To switch hidden folders on, navigate to Launchpad/Other, run Terminal and in the terminal window type defaults write com.apple.finder AppleShowAllFiles YES This will allow you to see all hidden files and folders.
Once you have deleted the preferences folder you may run E-Stim Connect, and the error should not occur again.
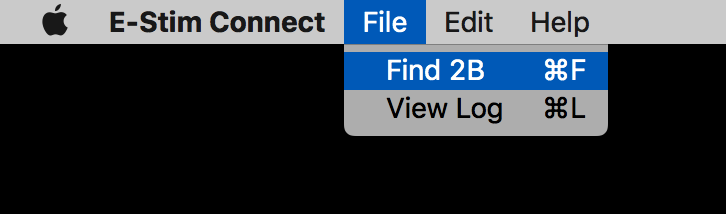
4 Find and connect to your 2B
Use the E-Stim Connect auto search feature to search for a connected 2B. Click on File Menu and select Find 2B (or Press ⌘F). This will start E-Stim Connect looking for a 2B plugged in and switched on and connected to the Digital Link Interface. The 2B must be connected, switched on and Commander Activated (versions 2.105 and below) for this to work.
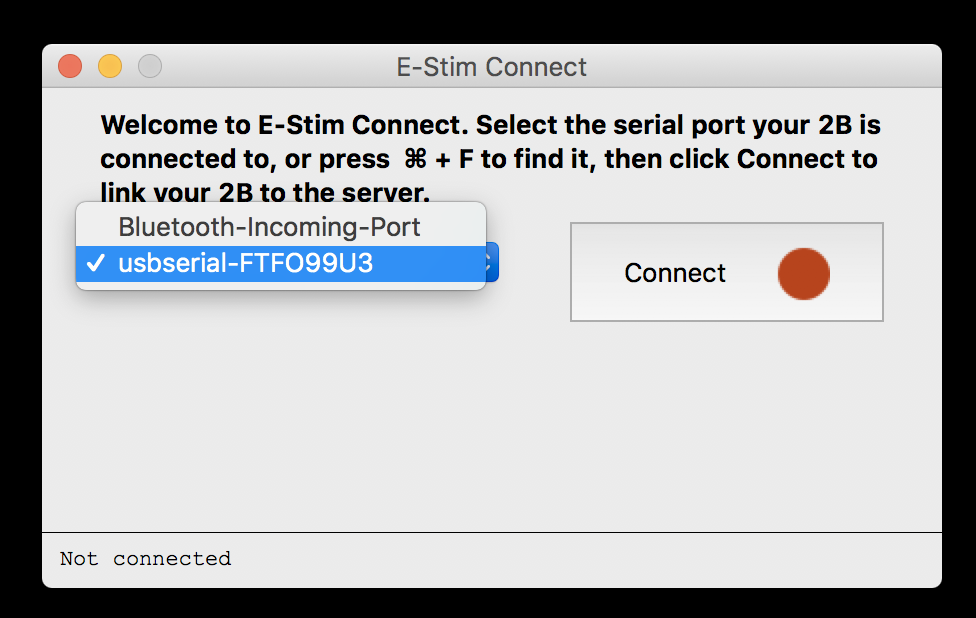
Manually selecting the Com port
If you do not want to use the Auto Search option, then you can manually select the serial port your Digital Link Interface is connected to via the dropdown menu.
2B Not found
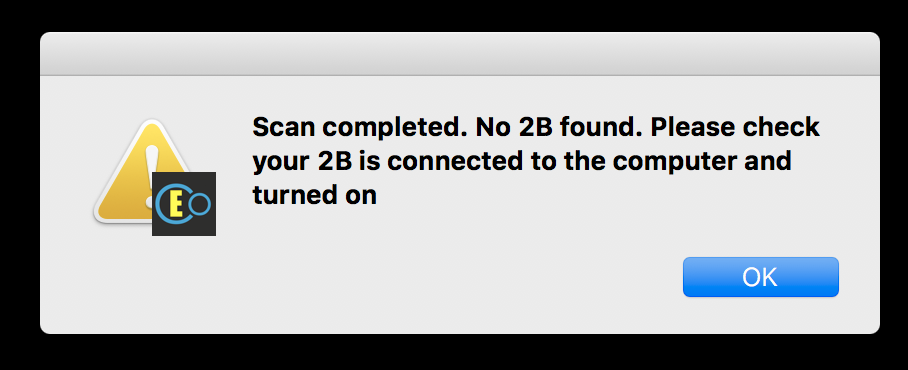
If a 2B is not found then check the Digital Link Interface cable is correctly connected to both the 2B and your computer, the 2B is switched on and if your 2B is running firmware older than 2.106, check that it is switched into Commander mode. Also check if the drivers have been correctly installed. If you continue to have issues then consult our troubleshooting guide.,
2B Found
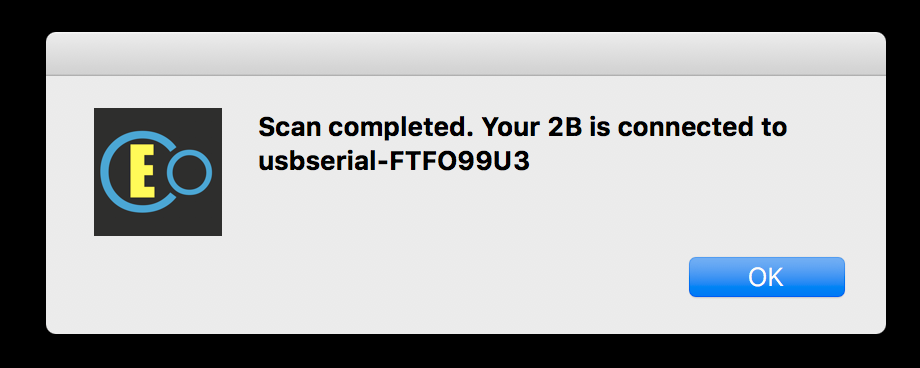
When your 2B has been successfully detected by E-Stim Connect, the COM port will be set and you will be offered an information window giving details of which port was detected. Click OK to continue.
5 Generate the Key
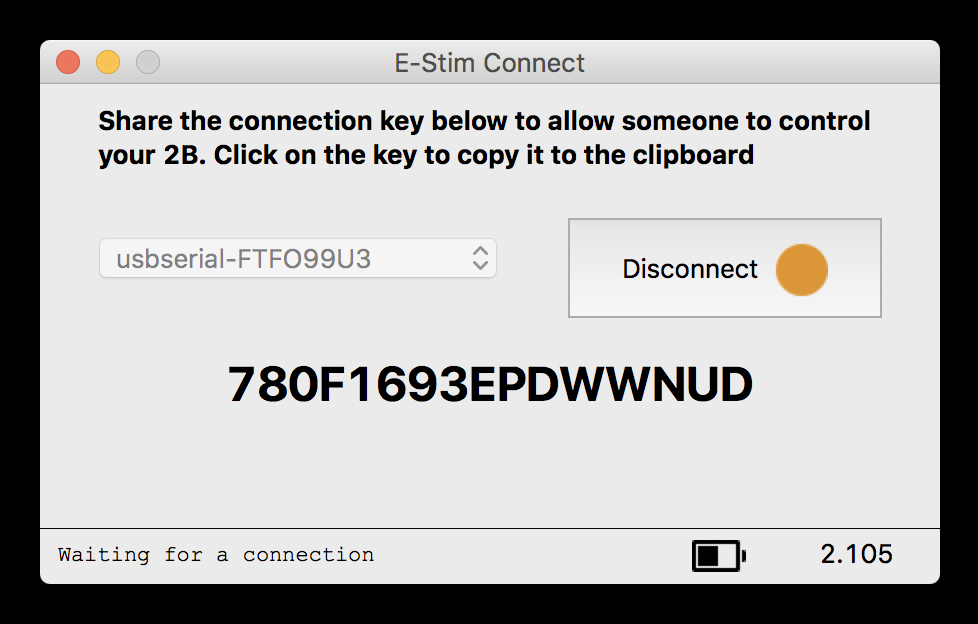
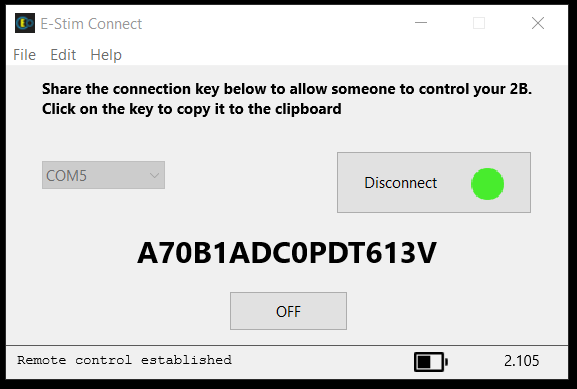
Once your 2B has been detected you can click on the Connect button, this will instigate a connection to our server and generate a unique Connection Key.
Once the connection has been established you should see the generated Connection Key, as well as connection details on your 2B (battery level and firmware version).
The button should now show orange indicating an connection to the server, but no connection to your remote partner.
No Connection to the Server
In the event the server is down, or your internet connection has been interrupted, then you might find you are not issued with a Connection Key, but E-Stim Connect shows that it has successfully connected to your 2B (as indicated by the battery Icon and the version number showing on the bottom of the screen). If this occurs then check your Internet connection and or try again later.
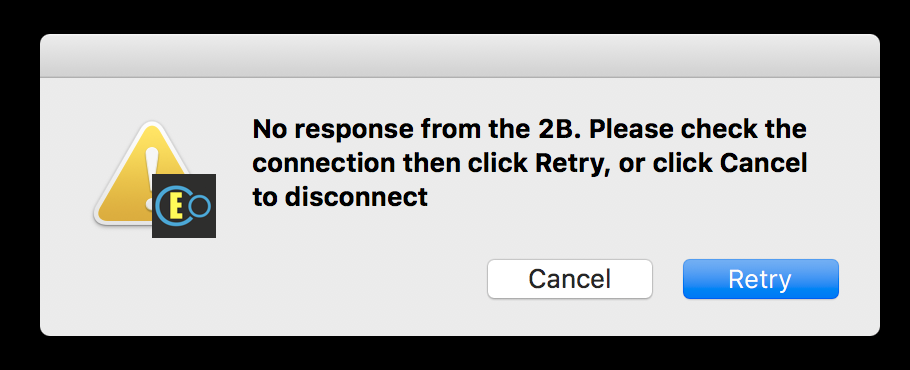
No Response
If you attempt a connection when your 2B has not been correctly detected, or you have inadvertently selected a COM port then you will get a no Response Error.
6 Set Preferences
As your 2B has now been found and is connected to our server, you can now setup any preferences you want via the menu option Edit->Preferences
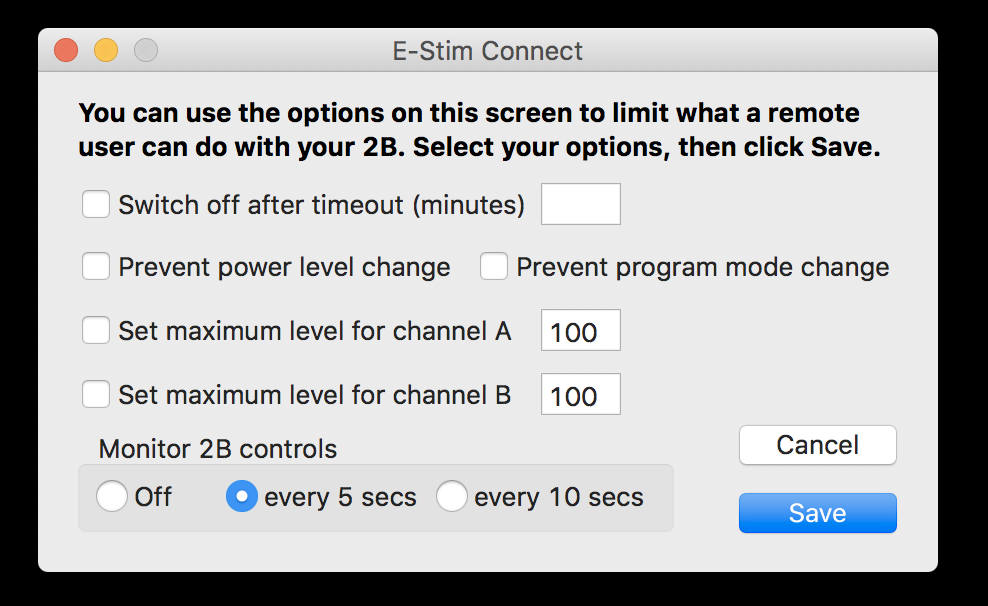
Preferences allow you to prevent the remote user from changing power levels (High/Low), changing the program mode, and you can set the maximum power levels the remote user can use. The maximum power level is only operational when the relevant tick-box is ticked. This allows you to preset the maximum level and then quickly select the option when you choose.
To set or clear a preference simply place a tick in the relevant box and click on the Save button. If you do not want to change any preference, then simple click on the Cancel Button to return to the main screen. Preferences are saved from session to session.
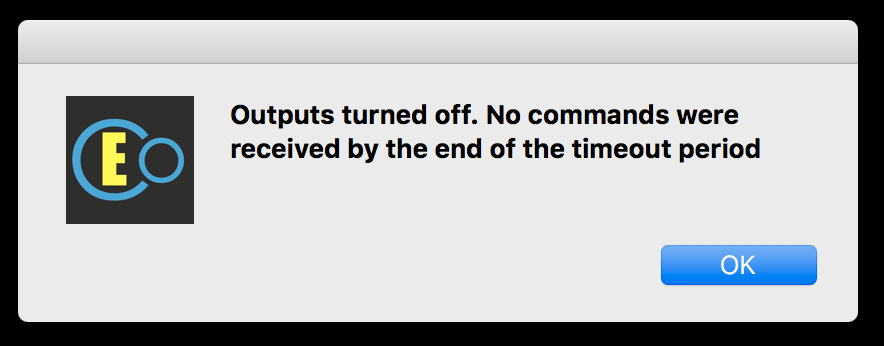
The 'switch off after timeout' setting allows you to ensure the outputs are automatically set to zero minutes after the last command has been received, the delay being defined by the number of minutes in the box. If the timeout tick box is checked, after xx minutes the following warning will show
7 Share the key
Right click on the key code, this will copy the key link to the clipboard. You can now send this link to your partner which will allow them access to the webpage on the server with your link code (use CTRL+V to past the link).

If you would rather just share the code, then ask them to visit https://e-stim.online/connect and type the code in.
Connection keys last 4 hours. If you do not use the key before the four hours expires then the key will be useless and you will have to generate and share another key. As long as you start to use a key within 4 hours of it being created, the session you are playing in will not be effected when the key expires. Only one person can use a connection key at a time.
Once the code is entered they then click on the blue connect button on the web page and they will see the E-Stim Connect control access page appear.
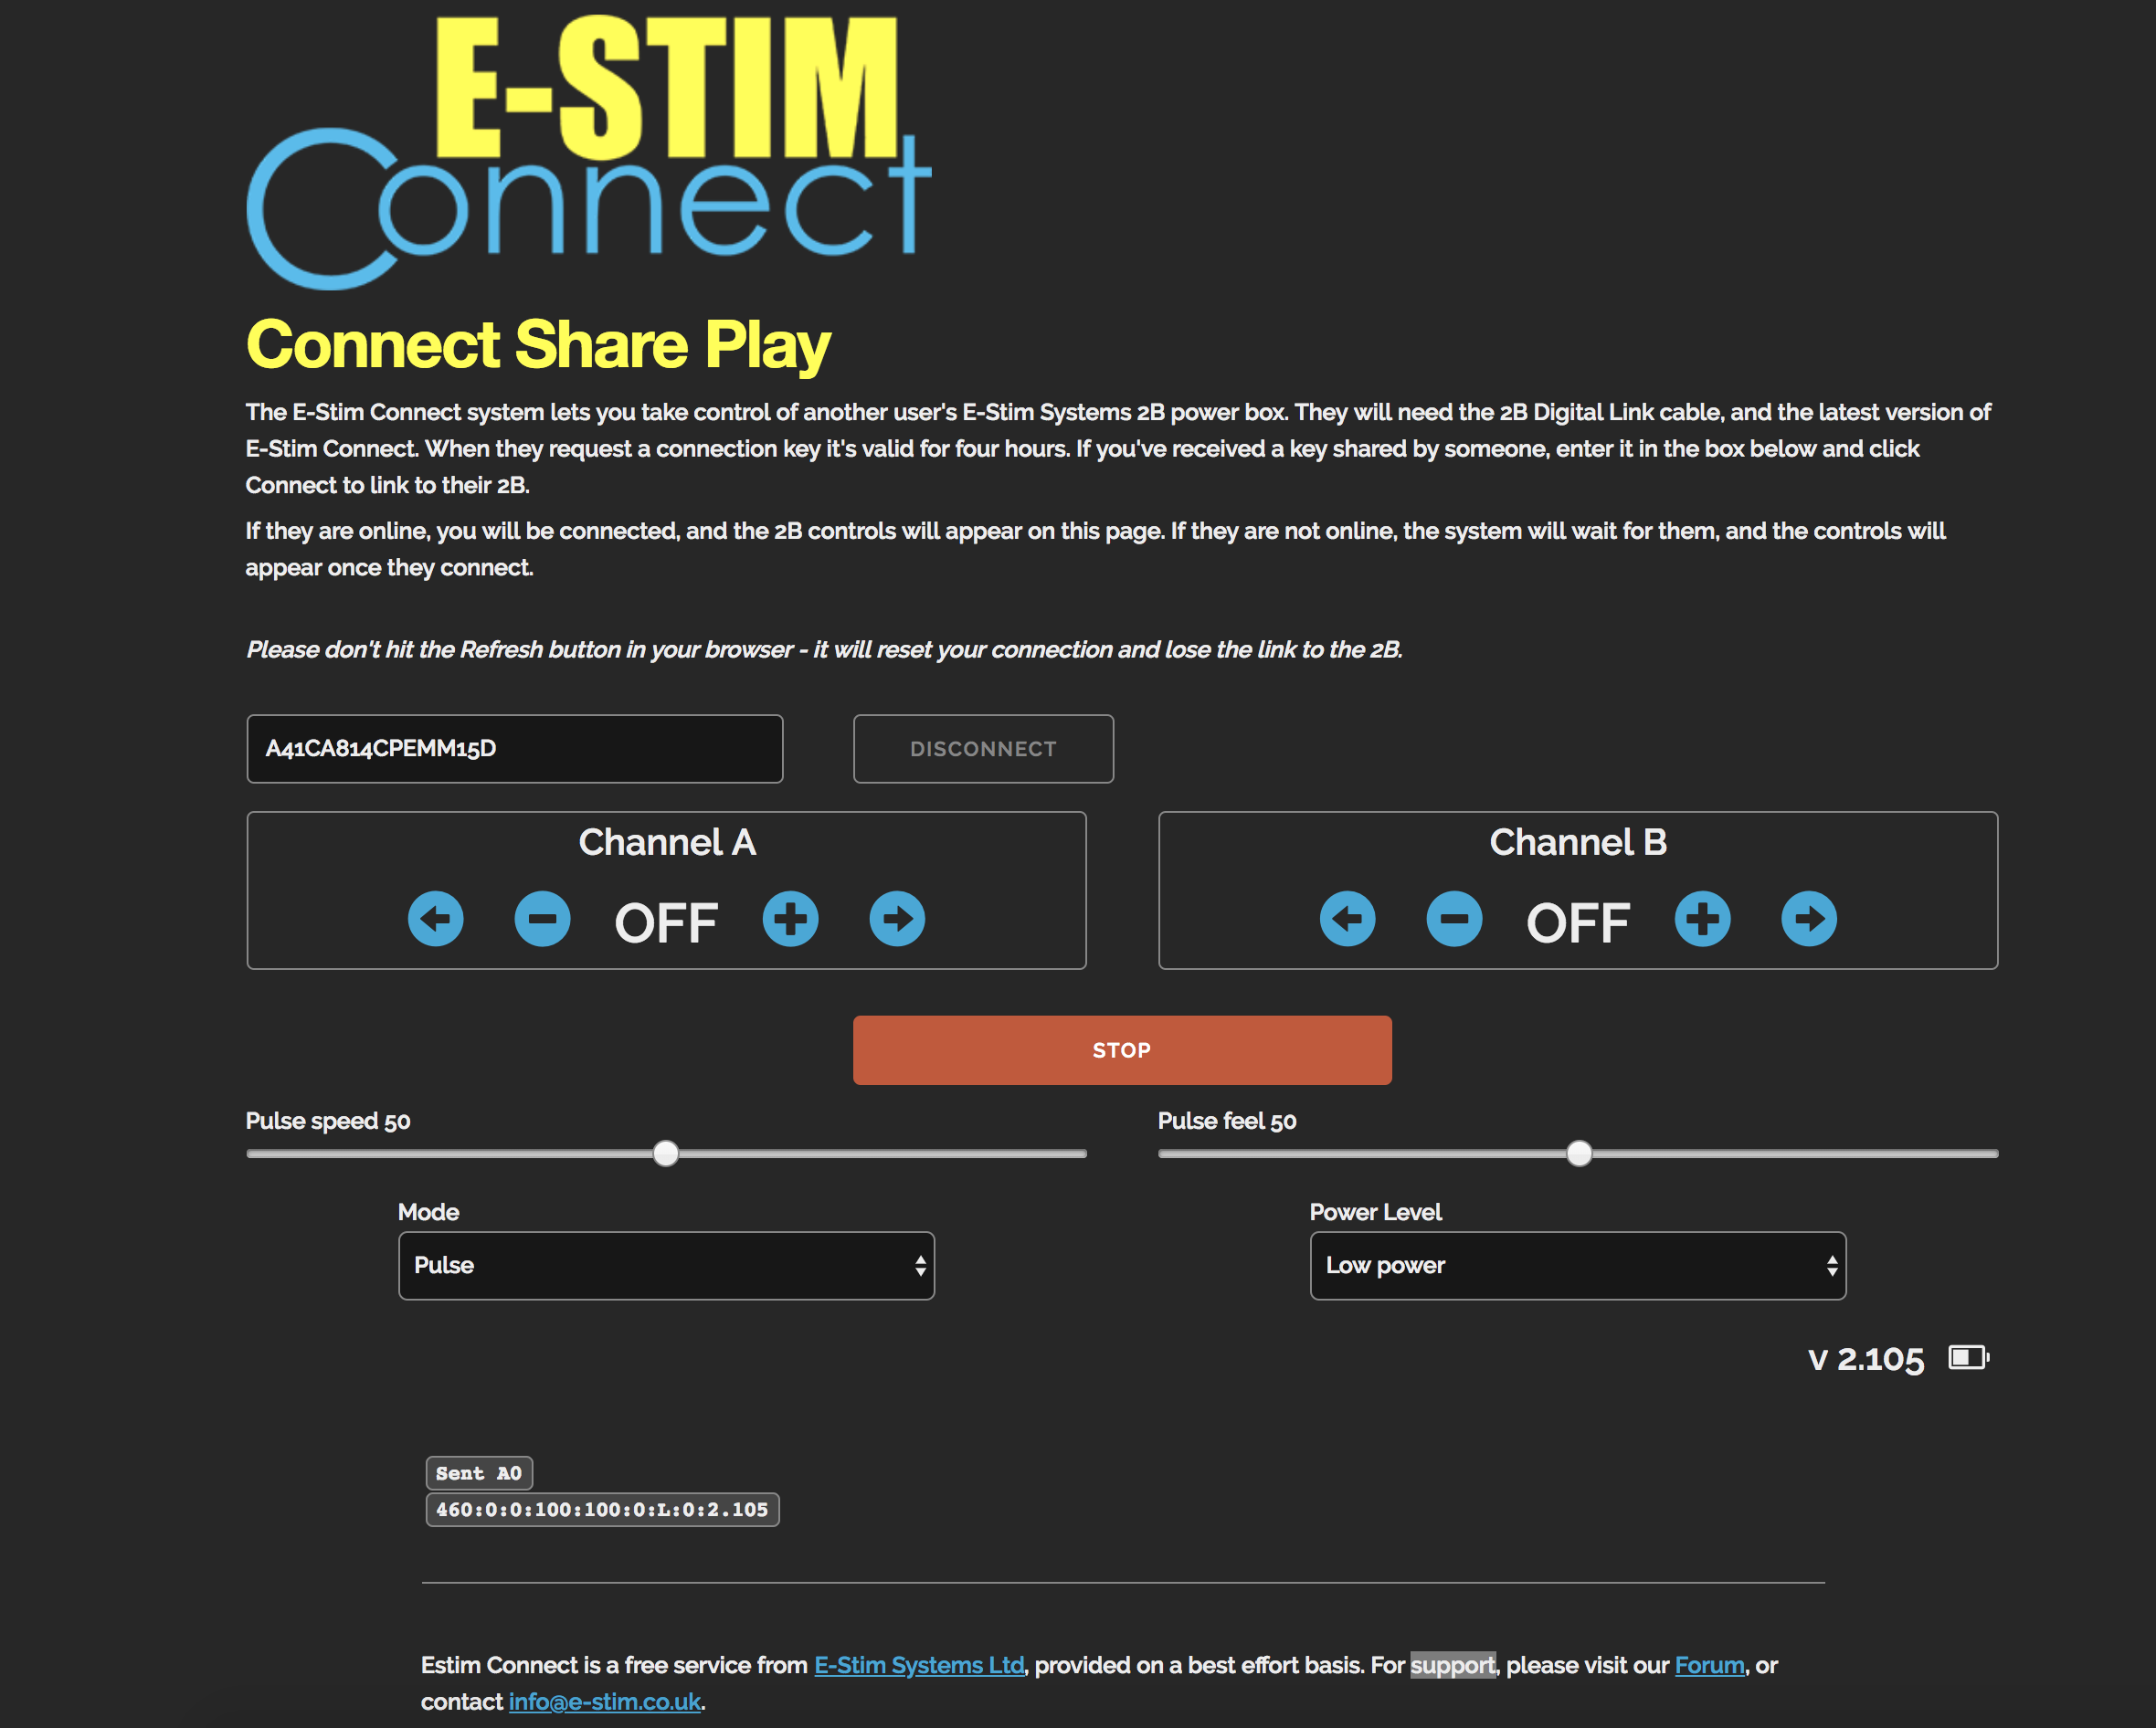
You should see the icon on thebutton on E-Stim Connect turn green indicating a connection with your remote partner. They can now use their web page to control your 2B.
If you makes changes to the 2B via the controls, the changes should be visible on your remote controllers screen after a few seconds, subject to the delays of the internet connection. The OFF Button allows you a quick method of overriding the remote user and dropping all the outputs on your 2B to zero.
8 Disconnecting
Pressing the Disconnect button will disconnect your current connection to your remote partner, but will still hold a connection to the server, giving them the ability to use the same key from a different device, you to pause play. If you press disconnect again, then E-Stim connect will disconnect from the Server and your 2B and the generated key will be invalidated.
In order to start play again, simply press the Connect button again to connect to our server and generate a new Connection Key.
